
The Essentials of Kid’s Room Renovation

Renovating a child’s room is an exciting and creative project that allows you to create a space where your child can learn, play, and grow. In this comprehensive guide, we’ll explore the essential aspects of renovating a kid’s room, from planning to execution, to help you design a functional and inspiring environment for your little one.
Introduction to Kid’s Room Renovation
A child’s room is not just a place to sleep; it’s a sanctuary for imagination, creativity, and personal growth. When renovating a kid’s room, it’s crucial to consider the unique needs and preferences of children at different ages. Whether you’re updating a nursery, transforming a toddler’s room, or reimagining a teenager’s space, the renovation should align with your child’s developmental stage and interests.
Planning Your Kid’s Room Renovation
The success of any renovation project begins with thorough planning. Before you start, take the following steps:
- Set Clear Objectives: Define the primary goals of the renovation. Are you aiming to create a stimulating learning environment, improve organization and storage, or enhance the room’s aesthetics?
- Budgeting: Establish a budget for the project. Determine how much you can invest while considering the quality of materials and furnishings. It’s essential to strike a balance between cost-effectiveness and creating a comfortable space.
- Safety Considerations: Prioritize safety by childproofing the room. Ensure that electrical outlets are secure, furniture is anchored, and sharp edges are padded. Choose non-toxic paints and materials to promote a healthy indoor environment.
- Age-Appropriate Design: Tailor the room’s design to your child’s age and interests. A nursery will have different requirements than a room for a school-aged child or a teenager. Ensure that the design promotes learning and development.
- Furniture and Storage: Select appropriate furniture and storage solutions. Invest in versatile pieces that can adapt to your child’s changing needs. Consider items like bunk beds with built-in desks or bookshelves for efficient use of space.
- Color and Decor: Choose a color scheme and decor that appeals to your child. Bright, cheerful colors can stimulate creativity and energy, while calming tones promote relaxation and sleep.
- Personalization: Involve your child in the design process. Let them choose elements like wall art, bedding, and decor items that reflect their personality and interests.
- Functionality: Design the room to be multifunctional. Create distinct zones for sleeping, playing, studying, and storage. Ensure that everything is easily accessible and age-appropriate.


Executing Your Kid’s Room Renovation
With a well-defined plan, it’s time to bring your vision to life. In this section, we’ll guide you through the practical steps of executing your kid’s room renovation.


- Demolition and Preparation:
Begin by removing existing fixtures, furniture, and decor. Ensure that the room is a clean slate before starting the renovation. Address any structural issues, such as cracks or leaks, and make necessary repairs.
- Design and Layout Implementation:
Based on your plan, start implementing the design and layout:
- Install flooring that suits the room’s function. Durable and easy-to-clean options like laminate or vinyl are ideal for kid’s rooms.
- Paint the walls or apply wallpaper. Consider using washable and stain-resistant finishes for easy maintenance.
- Install lighting fixtures that provide adequate brightness for different activities. Include task lighting for reading or studying.
- Furniture and Storage Installation:
Assemble and place the selected furniture in their designated spots. Ensure that everything is secured to prevent accidents. Maximize storage space with shelves, cabinets, and toy organizers.

- Safety Measures:
Double-check safety features in the room. Install safety gates if needed, secure heavy furniture to the wall, and cover electrical outlets. Ensure all cords are out of reach.
- Decoration and Personalization:
Add the finishing touches that make the room unique and inviting. Hang artwork, display personal creations, and incorporate elements that reflect your child’s interests.
- Quality Control and Safety Inspection:
Before your child moves into the renovated room, conduct a thorough inspection. Check for any loose fixtures, sharp edges, or safety hazards. Ensure that the room meets safety standards.
- Cleaning and Organization:
Give the room a final cleaning to remove dust and debris. Organize toys, books, and belongings in their designated storage spaces. Encourage your child to maintain a tidy room.


- Welcoming Your Child to the New Space:
Finally, invite your child to see their newly renovated room. Allow them to explore and personalize the space further with their input. This will help them feel a sense of ownership and comfort in their new environment.
In conclusion, renovating a kid’s room can be a rewarding project that enhances your child’s living space and fosters their development. By planning carefully and executing with their needs in mind, you can create a room where your child can thrive, learn, and create cherished memories.
- Creating Learning and Play Zones:
Depending on your child’s age, consider creating designated learning and play zones within the room. For younger children, a reading nook with a comfy chair and bookshelves can encourage a love of reading. Older kids may benefit from a study area with a desk and proper lighting for homework.
- Adapting for Growth:
Keep in mind that your child will continue to grow and their interests will evolve. Plan for flexibility in the room’s design so that it can adapt to their changing needs. Invest in furniture and decor that can easily be updated or repurposed.
- Technology Integration:
As technology plays an increasingly significant role in education and entertainment, consider integrating technology into the room. Ensure that there are accessible outlets for devices and that cords are safely managed.
- Regular Maintenance and Updates:
Encourage regular maintenance and updates to keep the room fresh and functional. Periodically assess the room for any wear and tear, and involve your child in decisions about room changes.
- Safety Reminders:
Continuously emphasize safety rules with your child. Teach them how to use furniture and equipment safely and the importance of tidying up after playtime.
- Nurture Creativity and Personal Growth:
Use the renovated room as a space to nurture your child’s creativity and personal growth. Provide art supplies, books, and educational toys to inspire their imagination.
- Personal Space for Your Child:
Allow your child to personalize their space further over time. Let them choose new decor, posters, or themes as their interests evolve. This sense of ownership can boost their self-esteem and responsibility.
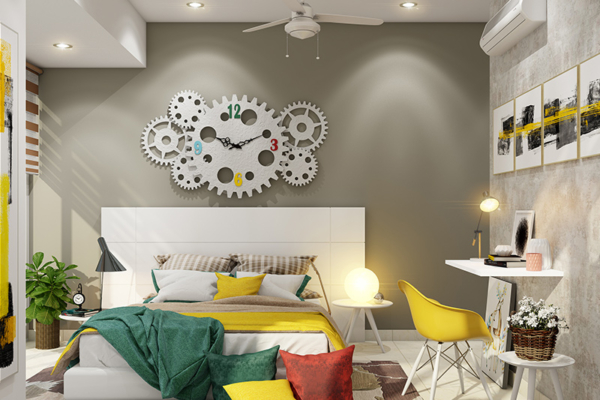
Conclusion:
Renovating your child’s room is a labor of love that can have a lasting impact on their development and happiness. By planning thoughtfully, focusing on safety, and adapting to your child’s needs, you can create a room that serves as a haven for their creativity, learning, and play. As your child grows, this space can evolve with them, providing a safe and comforting environment for years to come. Enjoy the journey of watching your child thrive in their newly renovated room!
